Hard Water, Hard Truths: Mineral Buildup and Soil Health
Why the minerals in your tap water are causing 'burnt' leaf tips and how to fix your soil's chemistry.
The Quick Dirt
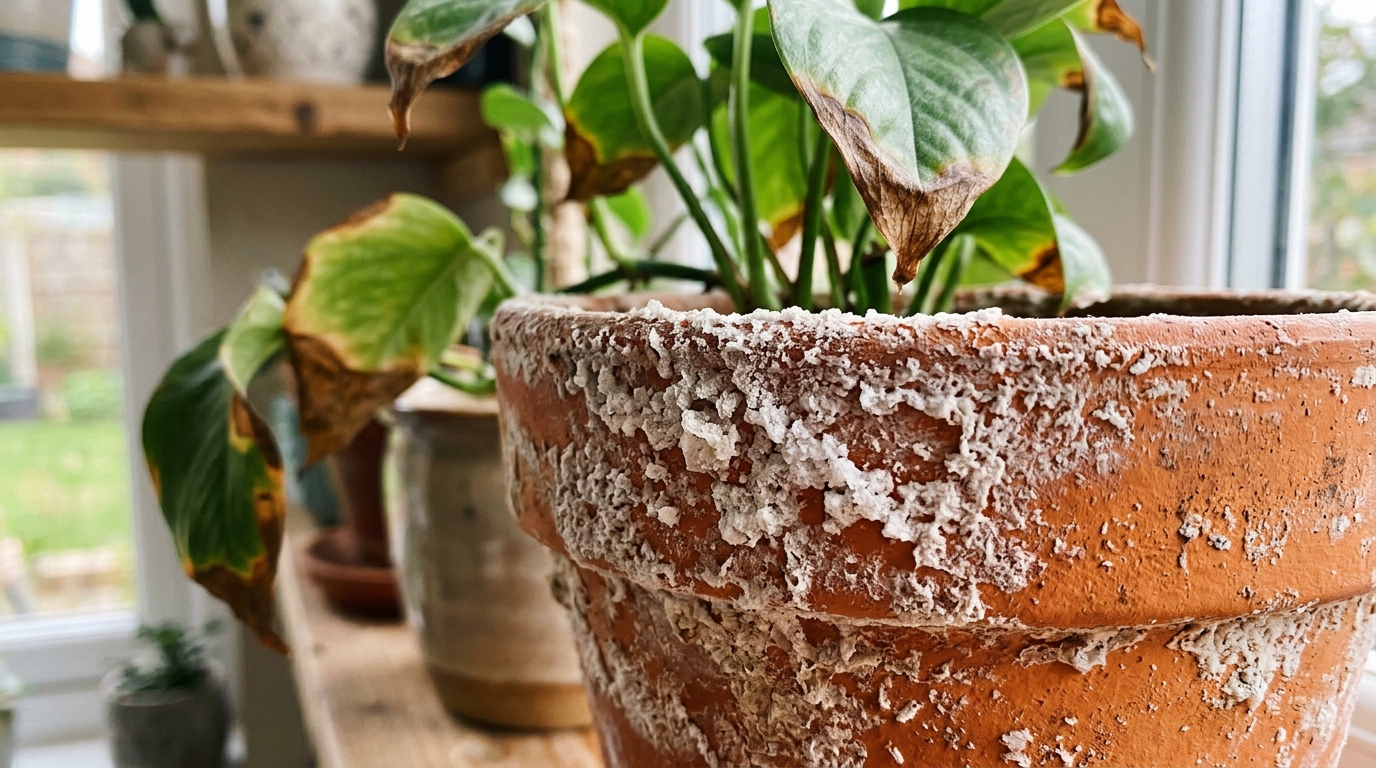
If you have ever noticed a white crust on your terra cotta pots, you have a salt problem. If the tips of your leaves are brown and brittle, the minerals in your tap water are building up. They are poisoning your soil’s mechanical efficiency.
1. Salt Accumulation
Most people think of salt as the stuff on their dinner table. In the greenhouse, salt refers to the concentrated mineral residue left behind by your tap water and fertilizer. Tap water is a mechanical delivery system for many things. It contains calcium, magnesium, chlorine, and fluoride. Every time you water, the plant drinks what it can. The rest evaporates. But the minerals do not evaporate. They stay behind in the soil. They bind to the dirt and the roots. Over time, this buildup changes the physics of how your plant drinks.
When the concentration of these minerals in the soil gets too high, it triggers reverse osmosis. In a healthy system, water moves from the soil into the roots. This happens because the roots have a higher concentration of nutrients. But when the soil is packed with accumulated salts, it starts pulling water out of the roots. The plant is literally being dehydrated by its own soil. This creates massive mechanical stress on the root hairs. Those hairs are the tiny pumps that bring water into the plant. They begin to shrivel and die. The plant’s internal plumbing starts to fail.
The first place you will see this failure is at the leaf tips. Think of the leaf tip as the end of the line for the plant’s water delivery system. When the roots cannot pull in enough pressure, the moisture never makes it to the edges. Those cells die off. They turn brown and brittle. It is not just a dry air problem. It is a root-zone chemical imbalance. I have seen people mist their plants for hours to fix brown tips. They never realize that the real problem is the hidden mineral blockade in the pot. If you want healthy leaves, start by cleaning up the soil chemistry.
2. The Flush Method
If you suspect your soil is getting salty, you cannot just water as usual. You need to perform a mechanical flush of the entire system. This is not a light watering. It is a deliberate attempt to wash the minerals out of the pot. Take your plant to the kitchen sink or the bathtub. You can take it outside if the weather is warm. Pour lukewarm water onto the soil surface until it is saturated. Then keep pouring. You want the water to flow freely out of the drainage holes for several minutes.
The goal here is physics, not hydration. You are using the volume and movement of the water to physically dissolve the mineral deposits. It carries away the accumulation that is stuck to the soil particles and the roots. A proper flush requires at least two to three times the volume of the pot in water. If you have a one-gallon pot, you should run three gallons of water through it. This resets the soil’s salinity level back to zero. It gets it as close as you can with tap water.
I recommend doing this every four to six weeks. Do it especially during the growing season when you are fertilizing. If you see that white, crusty buildup on the surface of the soil, that is your mechanical signal. A flush is overdue. Do not worry about overwatering during a flush. As long as your pot has good drainage holes, the extra volume will not hurt. You are clearing the pipes. You are giving the roots a fresh environment to breathe in. It is the single most effective way to stop brown tips before they start.
3. Better Sources
If you are dealing with hard city water, you are fighting an uphill battle. You can flush all you want, but if you keep putting liquid minerals back in, the problem returns. Some plants can handle the hard water just fine. These are the survivors, like Pothos or Heartleaf Philodendrons. But for the divas, you might need to change your water source entirely. Calatheas, Orchids, and carnivorous plants need pure water to keep the system running.
Rainwater is the gold standard of the gardening world. It is naturally soft. It has almost zero dissolved minerals. Even better, it is slightly acidic. Most tropical plants evolved in these conditions. That slight acidity helps the roots absorb nutrients more efficiently. If you can set up a rain barrel, your plants will reward you with massive growth. If that is not an option, distilled water is your next best bet. You can also use reverse-osmosis water. It is pure H2O with no mechanical baggage.
Avoid softened water from a household system at all costs. Those systems work by replacing calcium and magnesium with sodium. While it is better for your pipes, it is toxic for your plants. You are literally pouring salt water into the pot. And do not believe the myth that letting the water sit out overnight fixes hard water. All that does is let the chlorine gas dissipate. The minerals do not go anywhere. In fact, as some of the water evaporates, the mineral concentration actually gets slightly higher. If you have a sensitive plant, you must give it the pure stuff.
Si’s Pro-Tip
If you see a white crust on the outside of your terra cotta pots, do not ignore it. That is the salt being pulled through the clay. Scrub it off with a brush and some plain water during your next repotting. It keeps the clay’s breathing pores open. It prevents the salt from leaching back into the roots.
Keep your hands dirty and your plants happy.

About the Author
Silas
The Practical Greenhouse Mentor
"Silas treats the greenhouse like a workshop of practical results. After 40 years of dirty hands, he’s learned that thriving plants are the result of honest observation and small, correct moves rather than luck. He’s the neighbor who knows exactly why your Pothos is pouting and how to fix it without the fuss."